I have wanted an antique pie safe for as long as I can remember. I am always lusting after them at antique stores, where they're set up with charming displays of ironstone bowls and platters, vintage aprons and tea towels, primitive candles and twinkle lights. And the finishes!! They usually wear coats of milk paint in barn red, mustard, county black, or a crackle. But alas, it's seldom that I've run across one for less than $500.
Until.........
One day, I pulled up Craigslist and put "pie safe" in the search field. The very first item that came up was an ad for a vintage pie safe for sale, in MY little town, for $80. Yep, $80. It had a small pic with it and I could see that it was two different colors...and the ad said it was in rough condition...but who cares???? it was right here in MY tiny town....and it was $80!!!!! I answered the ad and a day later, it was mine.
The lady I bought it from said it had come from her aunt's farmhouse, and after she received it, it had been in her pole barn for quite some time. And so, yes, it was in pretty rough condition, but its "bones" were still good. There was no rotting of the wood. Just lots and lots of dirt and grime.
I was hoping it had punched tin on its doors or cabinet sides like many pie safes have, but instead it has a small circle with a screen in it at the bottom of each side, which now that I have lived with it for a little while, I think I actually prefer.
The drawers were in particularly bad shape. I'm pretty sure at one point some furry little creatures were using them for a cozy warm house. They were pretty bad... unfortunately, in no way did it resemble the cute little mice houses you see on the old cartoons where Mama mouse is tucking her little baby mice under a pretty quilt in their little matchbox bed.
The first thing I did to the drawers was to clean them in bleach water, then ammonia, then Murphy's Oil Soap, and then let them sit in the sun for days. The rest of the it, I just cleaned and cleaned.
When I finally got it all clean, I treated the whole inside of it and the drawers with wood conditioner.
And then I stained the whole inside and the drawers with a dark wood stain.
After it dried, the inside looked like this:
The next step was to chose a color for the outside. After much handwringing and indecision, I finally decided to go with a dark barn red. I knew that I was going to distress it a bit though, so I was concerned about the two different colors on each side.
Why was it two different colors anyway??? At first I thought someone had experimented with the dark brown paint and painted over the original finish. After further inspection though, I realized what they had done was strip the original dark brown paint off but they only got halfway done.
With such detailed trim, I decided that stripping was not an option and the best thing to do was to match up the dark brown as well as possible, paint the whole thing, and then paint all over it with red milk paint.
Wonderful husband went to the paint store with me, and I was so focused on finding the perfect red, I told him to just pick out a brown that was as close to the original as he could get. I found my red, came home, and started slapping on the brown paint.
It was a little light, but then again, it didn't really matter because it was going to be covered up anyway.
But the more it dried, the darker it got....until it was almost identical to the original paint (Wonderful Husband!!). By the time I got it all painted, I had completely forgotten about the red. This pie safe wanted to be brown...it just suited him.
After it was dried, I lightly distressed the carvings on the doors,
and around the door pulls, and then prettied it up some...
Here's another shot of the BEFORE and AFTER
I still need to find some drawer pulls and I'm thinking I'll probably line the shelves with fabric, but the hard part is done!!
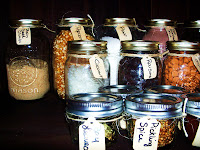
I can honestly say this is probably the best $80 I have ever spent. I love it!! And all the extra storage!! And it motivated me to finally start a project I've been meaning to do forever....put most of my dry goods in Mason jars with cute little altered tags (which will be next week's post).
I'm linking this up to Susan's Metamorphosis Monday & Kimba's DIY Day.
Thanks for stopping by,
Valeree

 I was initially a little skeptical when I ordered these from QVC. I was afraid they would look artificial and tacky. After living with them for the last few months, I can't imagine being without them. I have them in and on both of my fireplaces and in a few other places around my house. I love that they're made from real wax & "wick" inside them and that they have timers so they all come on for 4 hours at the same time every evening. They really do an amazing job simulating real candlelight and the warmth they bring to every room that they're in has been so worth it.


